はじめに
Cognitoは基本的なログイン認証を行うこともできます。
以下のような方におすすめの内容です。
- AWS初心者で勉強している
- AWSリソースを認証を使って行いたい
- AWS認定資格を学習している
この記事では、AWS Cognitoのユーザー・パスワード認証を行う方法をご紹介します。
Cognitoの設定方法
- ユーザープールの作成
- アプリクライアントの作成
- 認証フローの確認
- API Gatewayと連携
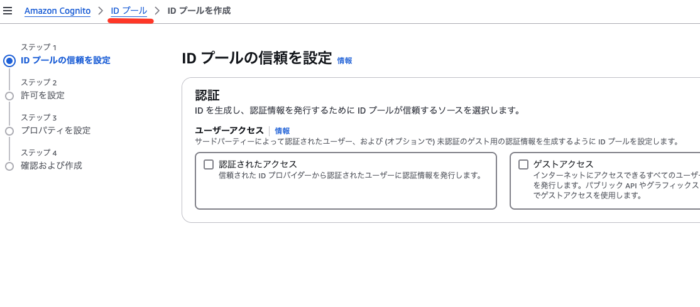
ユーザープールの作成
Cognitoでユーザープールを作成します。
ユーザープールの欄が見つからない場合は、パンくずリストのIDプールをクリックするとユーザープールの選択欄が出てきます。
アプリクライアントの作成
今回はlocalhostなのでシングルアプリケーションを選択します。
認証をWebサーバー上で行う場合は「従来のウェブアプリケーション」を選択しましょう。
※localhostからの実行の場合は「従来のウェブアプリケーション」で動作しません。

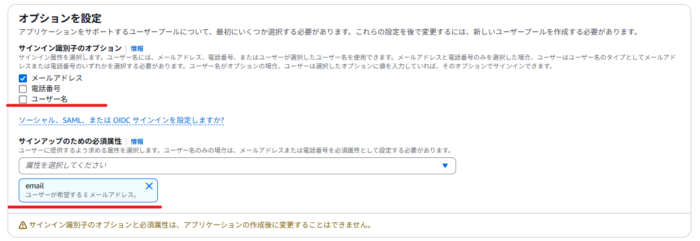
オプションでメールアドレスがないと認証できないように設定します。
電話番号やユーザー名等複数の認証方法があるので、必要な場合は選択しましょう。
認証成功したときのURLを設定します。
localhost:8200の部分は各自のテスト環境のホスト名を設定しましょう。
作成したらCognitoにsign-upのコマンドで認証ユーザーを追加していきます。
sign-upのコマンドを使用するには、アプリクライアントIDを取得する必要があります。
アプリクライアントIDを取得するには、ユーザープールIDを取得する必要があります。
# ユーザープールIDの取得
aws cognito-idp list-user-pools --max-results 10
# アプリクライアントIDの取得
aws cognito-idp list-user-pool-clients --user-pool-id <ユーザープールID>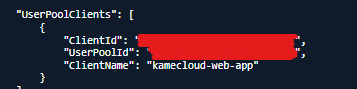
メールアドレスは必須の認証情報にしているので、設定しておきます。
セッションとかが設定されて表示されれば、サインアップの認証コードがメールアドレスに届いているので、確認してください。
aws cognito-idp sign-up \
  --client-id [アプリクライアントID] \
  --username [任意のメールアドレス] \
  --password [任意のパスワード] \
  --user-attributes Name="email",Value="[任意のメールアドレス]"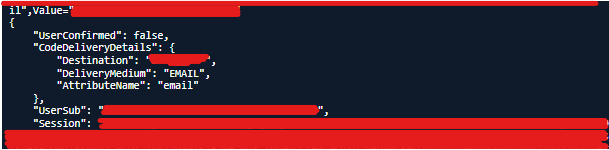
認証コードを確認したら、クライアントIDと認証コードを設定しましょう。
これでサインアップができます。
aws cognito-idp confirm-sign-up \
  --client-id [アプリクライアントID] \
  --username [設定したメールアドレス] \
  --confirmation-code [認証コード]
大量のSessionが返ってきたらOKです。
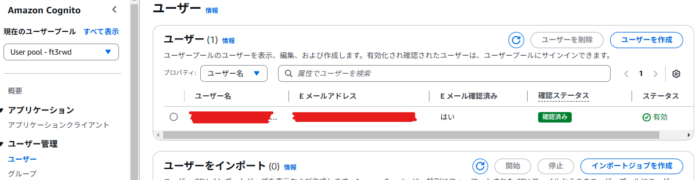
ユーザーが追加されている確認してください。
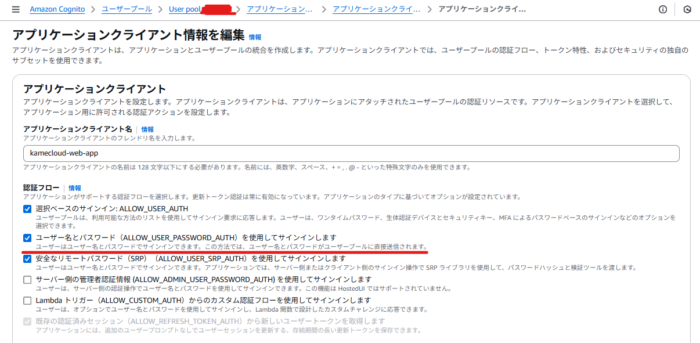
認証フローの確認
ログインするときにパスワードを入力して認証を行う場合は「ALLOW_USER_PASSWORD_AUTH」を有効にする必要があります。
アプリケーションクライアントの情報から編集を行って「ALLOW_USER_PASSWORD_AUTH」を有効にしてください。
動作確認
ログインページからメールアドレス・パスワードを入力して認証OKならトークンが返ってきて、ローカルストレージに保存します。
その後、リダイレクトしてログイン後のページに遷移します。
<!DOCTYPE html>
<html lang="ja">
<head>
    <meta charset="UTF-8">
    <meta name="viewport" content="width=device-width, initial-scale=1.0">
    <title>Cognito 認証</title>
</head>
<body>
  <form id="login_form">
    <input type="email" id="email" placeholder="メールアドレス" required>
    <input type="password" id="password" placeholder="パスワード" required>
    <button>ログイン</button>
  </form>

  <script>
      document.getElementById("login_form").addEventListener("submit", async function(event) {
      event.preventDefault();

      const email = document.getElementById("email").value;
      const password = document.getElementById("password").value;
      const client_id = "6vnvjjpd8f8156rmru7dic2eqj";
      const user_pool_domain = "ap-northeast-1nfnevqxsd.auth.ap-northeast-1.amazoncognito.com";

      const tokenUrl = `https://cognito-idp.ap-northeast-1.amazonaws.com/`;

      try {
        const res = await fetch(tokenUrl, {
          method: "POST",
          headers: {
            "Content-Type": "application/x-amz-json-1.1",
            "X-Amz-Target": "AWSCognitoIdentityProviderService.InitiateAuth"
          },
          body: JSON.stringify({
            AuthFlow: "USER_PASSWORD_AUTH",
            ClientId: client_id,
            AuthParameters: {
              USERNAME: email,
              PASSWORD: password
            }
          })
        });

        const data = await res.json();
        if (data.AuthenticationResult.AccessToken) {
          console.log("ログイン成功");
          localStorage.setItem("access_token", data.AuthenticationResult.AccessToken);
          window.location.href="dashboard.html";
        } else {
          console.log(data);
          alert("ログイン失敗", data);
        }
      } catch (error) {
        console.error("エラー:", error);
        alert("ログインエラー");
      }
    });
  </script>
</body>
</html>
ログイン後のページでAPIを実行してトークンからログインユーザーを取得しています。
取得出来たら「認証成功!」のアラートが出ます。
もし失敗してログイン入力画面に戻るのであれば、一度開発ツールのコンソールで何のエラーが出てるか確認してください。
<!DOCTYPE html>
<html lang="ja">
<head>
  <meta charset="UTF-8">
  <meta name="viewport" content="width=device-width, initial-scale=1.0">
  <title>ダッシュボード</title>
</head>
<body>
  <h1>ダッシュボード</h1>
  <button onclick="callApi()">APIを実行</button>

  <script>
    async function callApi() {
      const access_token = localStorage.getItem("access_token");
      console.log(access_token);
      if (!access_token) {
        alert("ログインが必要です。");
        window.location.href = "index.html";
        return;
      }
      const res = await fetch("https://cognito-idp.ap-northeast-1.amazonaws.com/", {
        method: "POST",
        headers: {
          "Content-Type": "application/x-amz-json-1.1",
          "X-Amz-Target": "AWSCognitoIdentityProviderService.GetUser"
        },
        body: JSON.stringify({
          AccessToken: access_token
        })
      });
      const data = await res.json();
      console.log(data);
      if (data.Username) {
          alert("認証成功!ユーザー: " + data.Username);
      } else {
          alert("認証エラー");
          localStorage.removeItem("access_token");
          window.location.href = "index.html";
      }
    }
  </script>
</body>
</html>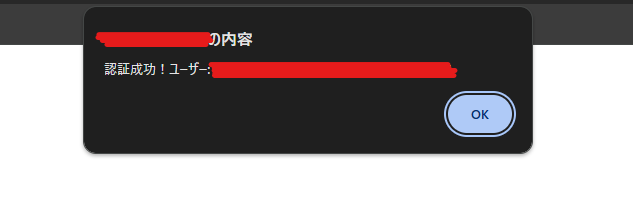
まとめ
AWS Cognito を使うと、サーバーレス環境でユーザー認証を簡単に実装 できます。
API Gateway や Lambda との連携により、認証されたユーザーのみが特定のAPIにアクセスできるよう設定 することもできます。
フロントエンドでは localStorage に access_token を保存し、ログイン後のページで トークンを使ったAPIリクエスト を実行できます。
Cognito の認証フローを理解し、APIと連携することで、よりセキュアでスケーラブルな認証システムを構築しましょう!